Translate:
Claim your FREE eBook here! "Sunshower's Art Speaks"
Translate:
Claim your FREE eBook here! "Sunshower's Art Speaks"
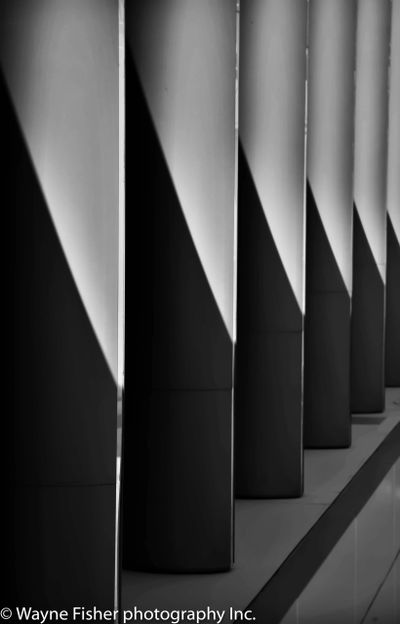
As you see, this composition has no focal point.
For this reason, it is a perfect BACKGROUND image for Collaborations. Are you beginning to see how fun it is to create collaboratively?
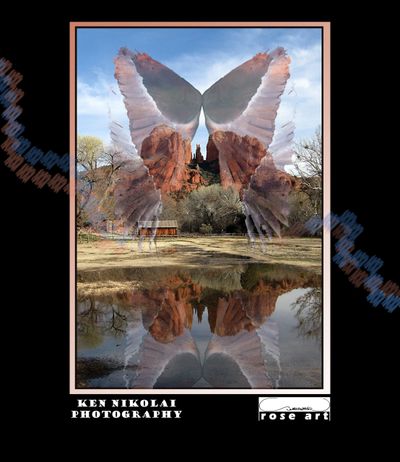
Photo by Wayne Fisher Photography, Inc.
And it gives the feeling of a lot of DEPTH.
It is architectural . . . and yet we cannot see the entire building. That makes this image interesting, as it creates CURIOSITY, as we begin to create collaboratively!
Not a requirement for collaborations - yet, these monotones make way for a COLOR FOREGROUND.

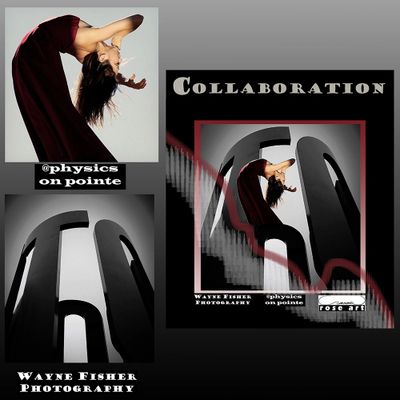
Here is a fashion illustration. It definitely has a focal point. Faces always draw the viewer's eye into the composition! Hence, this layer is a perfect example for collaborations.
There is no guess work: "What do I need to eliminate to make these two pieces fit well together, as I create collaboratively?"
Like the BACKGROUND piece, this illustration has great possibilities for TRANSPARENCY, a very BIG part of Collaborative Art WORKS!™
The WHITE suit and hat shall remain as they are. The white backgournd to this piece needs to disappear, so that only the illustration will be 'overlaid' on to the BACKGROUND - See Example 1, Step 1.
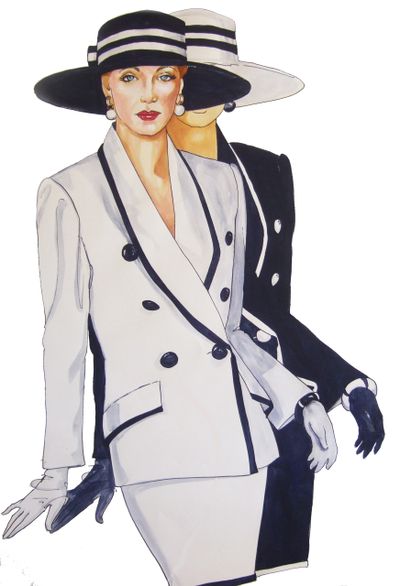
We want to emphasize the focal image as we dive into our collaborations. In Photoshop, you can make the 'noise' around an image disappear.
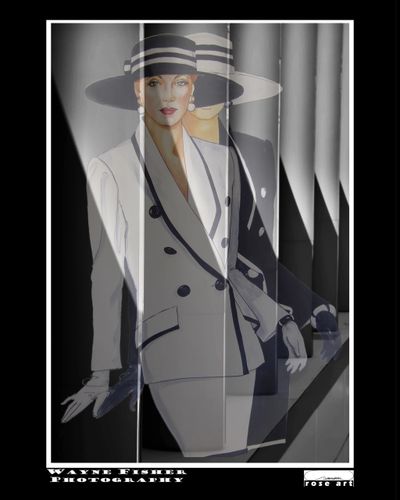
Once you have made the background of your focal image disappear - or have 'erased' it, you can play with the two images, working together, creating collaborations! One image is yours and the other image is someone else's, each giving permission, of course!
Again, in Photoshop or a related program - as long as you use digital imaging, you can create layers and transparency!
Once you have the BACKGROUND image, literally set as the 'background layer' - then add your focal image for your collaborations.
You can:
1. Size and re-size your focal image - to see where it looks the best against the background image.
2. You can move it around - for the same reason.
3. You can flip it.
4. You can duplicate it!
5. You can change its color!
Now, what do you think of COLLABORATIONS!
Once you have positioned your focal image (the 'upper layer') - and created the amount opacity (transparency) you like - and FLATTENED your collaborations LAYERS . . .
Creating 'frames' around your collaborations is simple, too. It's all about 'making boxes' - and placing your 'flattened' image as another layer. You can make as many frames as you see 'fit'!
You, as the creator of the Collaboration, will put your signature or logo - on the bottom, right. Your collaborator's signature, or 'text' name goes to the bottom, left.
Then, give credit to all three at the bottom of your Triple Collaboration! Yay for Collaborations!
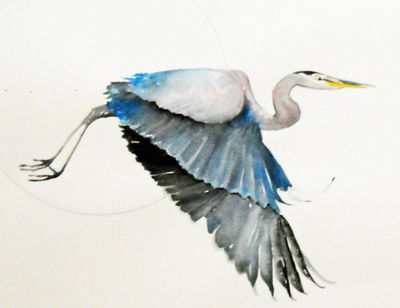
This Blue Heron's wing will be color-inverted, rotated and duplicated, to create the 'look' of a butterfly, as you will see in the next step.
The original Blue Heron watercolor was painted on white paper.
As I manipulate in PhotoShop, only the wing becomes the top layer of this collaboration.
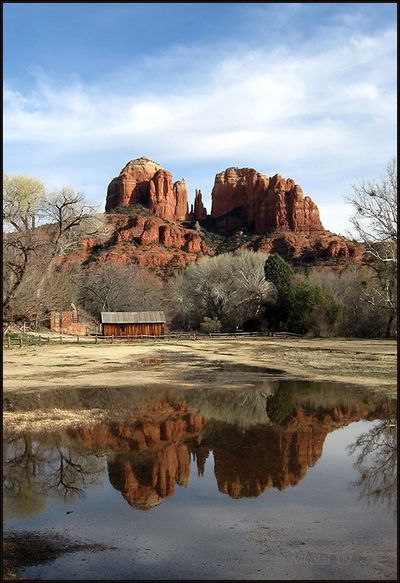
A shot of the most photographed Red Rock in Sedona, Arizona - by Ken Nikolai.
This photo becomes the background for a Collaboration.
In the case of Collaborations, there is an added opportunity to play with transparency and upside down fun!

Here, the one Heron wing has been duplicated and flipped - placing the two images in juxtaposition with each other, as we start to create collaboratively.
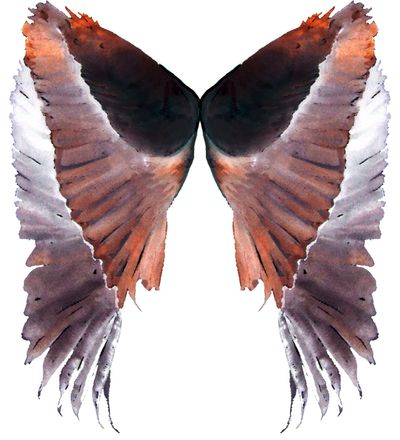
As in Example 1, we now must erase the 'noise' around the focal image
Thus, it stands alone . . . as the . . .
focal point of the collaboration
1. You have the photo of the Red Rocks as your background layer
2. You have the 'butterfly wings', as your 'upper layer'
3. Play with placement and opacity (transparency)
4. Re-size and rotate the top layer, to 'fit' well as part of the reflection in the water
Once you have . . .
1. positioned your focal image(s) - the 'upper' layer
2. created the amount of opacity (transparency) you like
3. flattened your collaborative layers
4. created your frame(s)
5. added you signature (or logo) and that of your collaborator's
Get MORE bold as you create collaboratively, and add some 'electric' action lines!
Sure! You're in charge of your composition. The author of this site likes to add the appearance of movement to these cool Collaborations.
So, use this idea - or not!
Experiment until you find the shape, color, spacing, rotation of the 'brush' you REALLY love, and . . .
Using your stylus . . .
Draw some 'action' curvy lines . . .
or whatever suits your fancy!
Contact Sunshower for some pointers, here, if you want.
(if it is not, already) . . . and start to play with other Creatives through this site!

Toriah - a hand painted Watercolor Collaboration.
Please note the:
1. female face, sublimated
2. ballerina
3. Impressionistic meadow and tree
Sunshower can teach you this kind of painting. Just contact her!

New Addition!
Now you can purchase Sunshower's Art
at Le Galeriste, THE site for
"ART on GARMENTS"
Just click on Le Galeriste, above!
Sample page, left

Creative revision from Hand of God, a watercolor and ink art piece - collaborated with a Ram and Mayan temple image, originally drawn with pencil.